Screenshot to Claude
See something cool on your phone: a tweet, an Instagram post, a screenshot of someone's setup. Send it to a folder on your Mac with one tap. Next time you sit down with Claude, ask it to walk you through everything you sent yourself. An ideas bin you actually look at. No API key. No code.
~10 min setup Mac + iPhone Free, uses iCloud Drive
Half your good thinking happens away from your Mac. You see a tweet about a tool, a screenshot of someone's workflow, a post that sparks an idea. You screenshot it. It dies in your Camera Roll.
Think of it like StarCraft. The drone doesn't fight. It gathers resources and brings them back to base so the player can decide what to build with them. This guide builds your drone.
- An iPhone (or iPad) and a Mac signed into the same Apple ID.
- iCloud Drive on for both, with Desktop & Documents sync turned on. (Mac: System Settings → Apple ID → iCloud → iCloud Drive → Desktop & Documents Folders. Usually already on.)
- Claude Code already set up. If you haven't, do the main onboarding first.
- About 10 minutes.
Path 1. Never used Claude Code? Do the main onboarding first (~10 min), then come back here for Steps 1-5 below.
Path 2. Already use Claude Code? Skip the long version. Jump to the quickstart below ↓
Path 3. Not sure? Just follow Steps 1-5 below. They work either way.
Make a drone folder
On your Mac, open Finder. In the sidebar, click Documents.
Right-click in the empty space and pick New Folder. Name it drone.
Here's what your Documents folder should look like once the drone folder is in place:
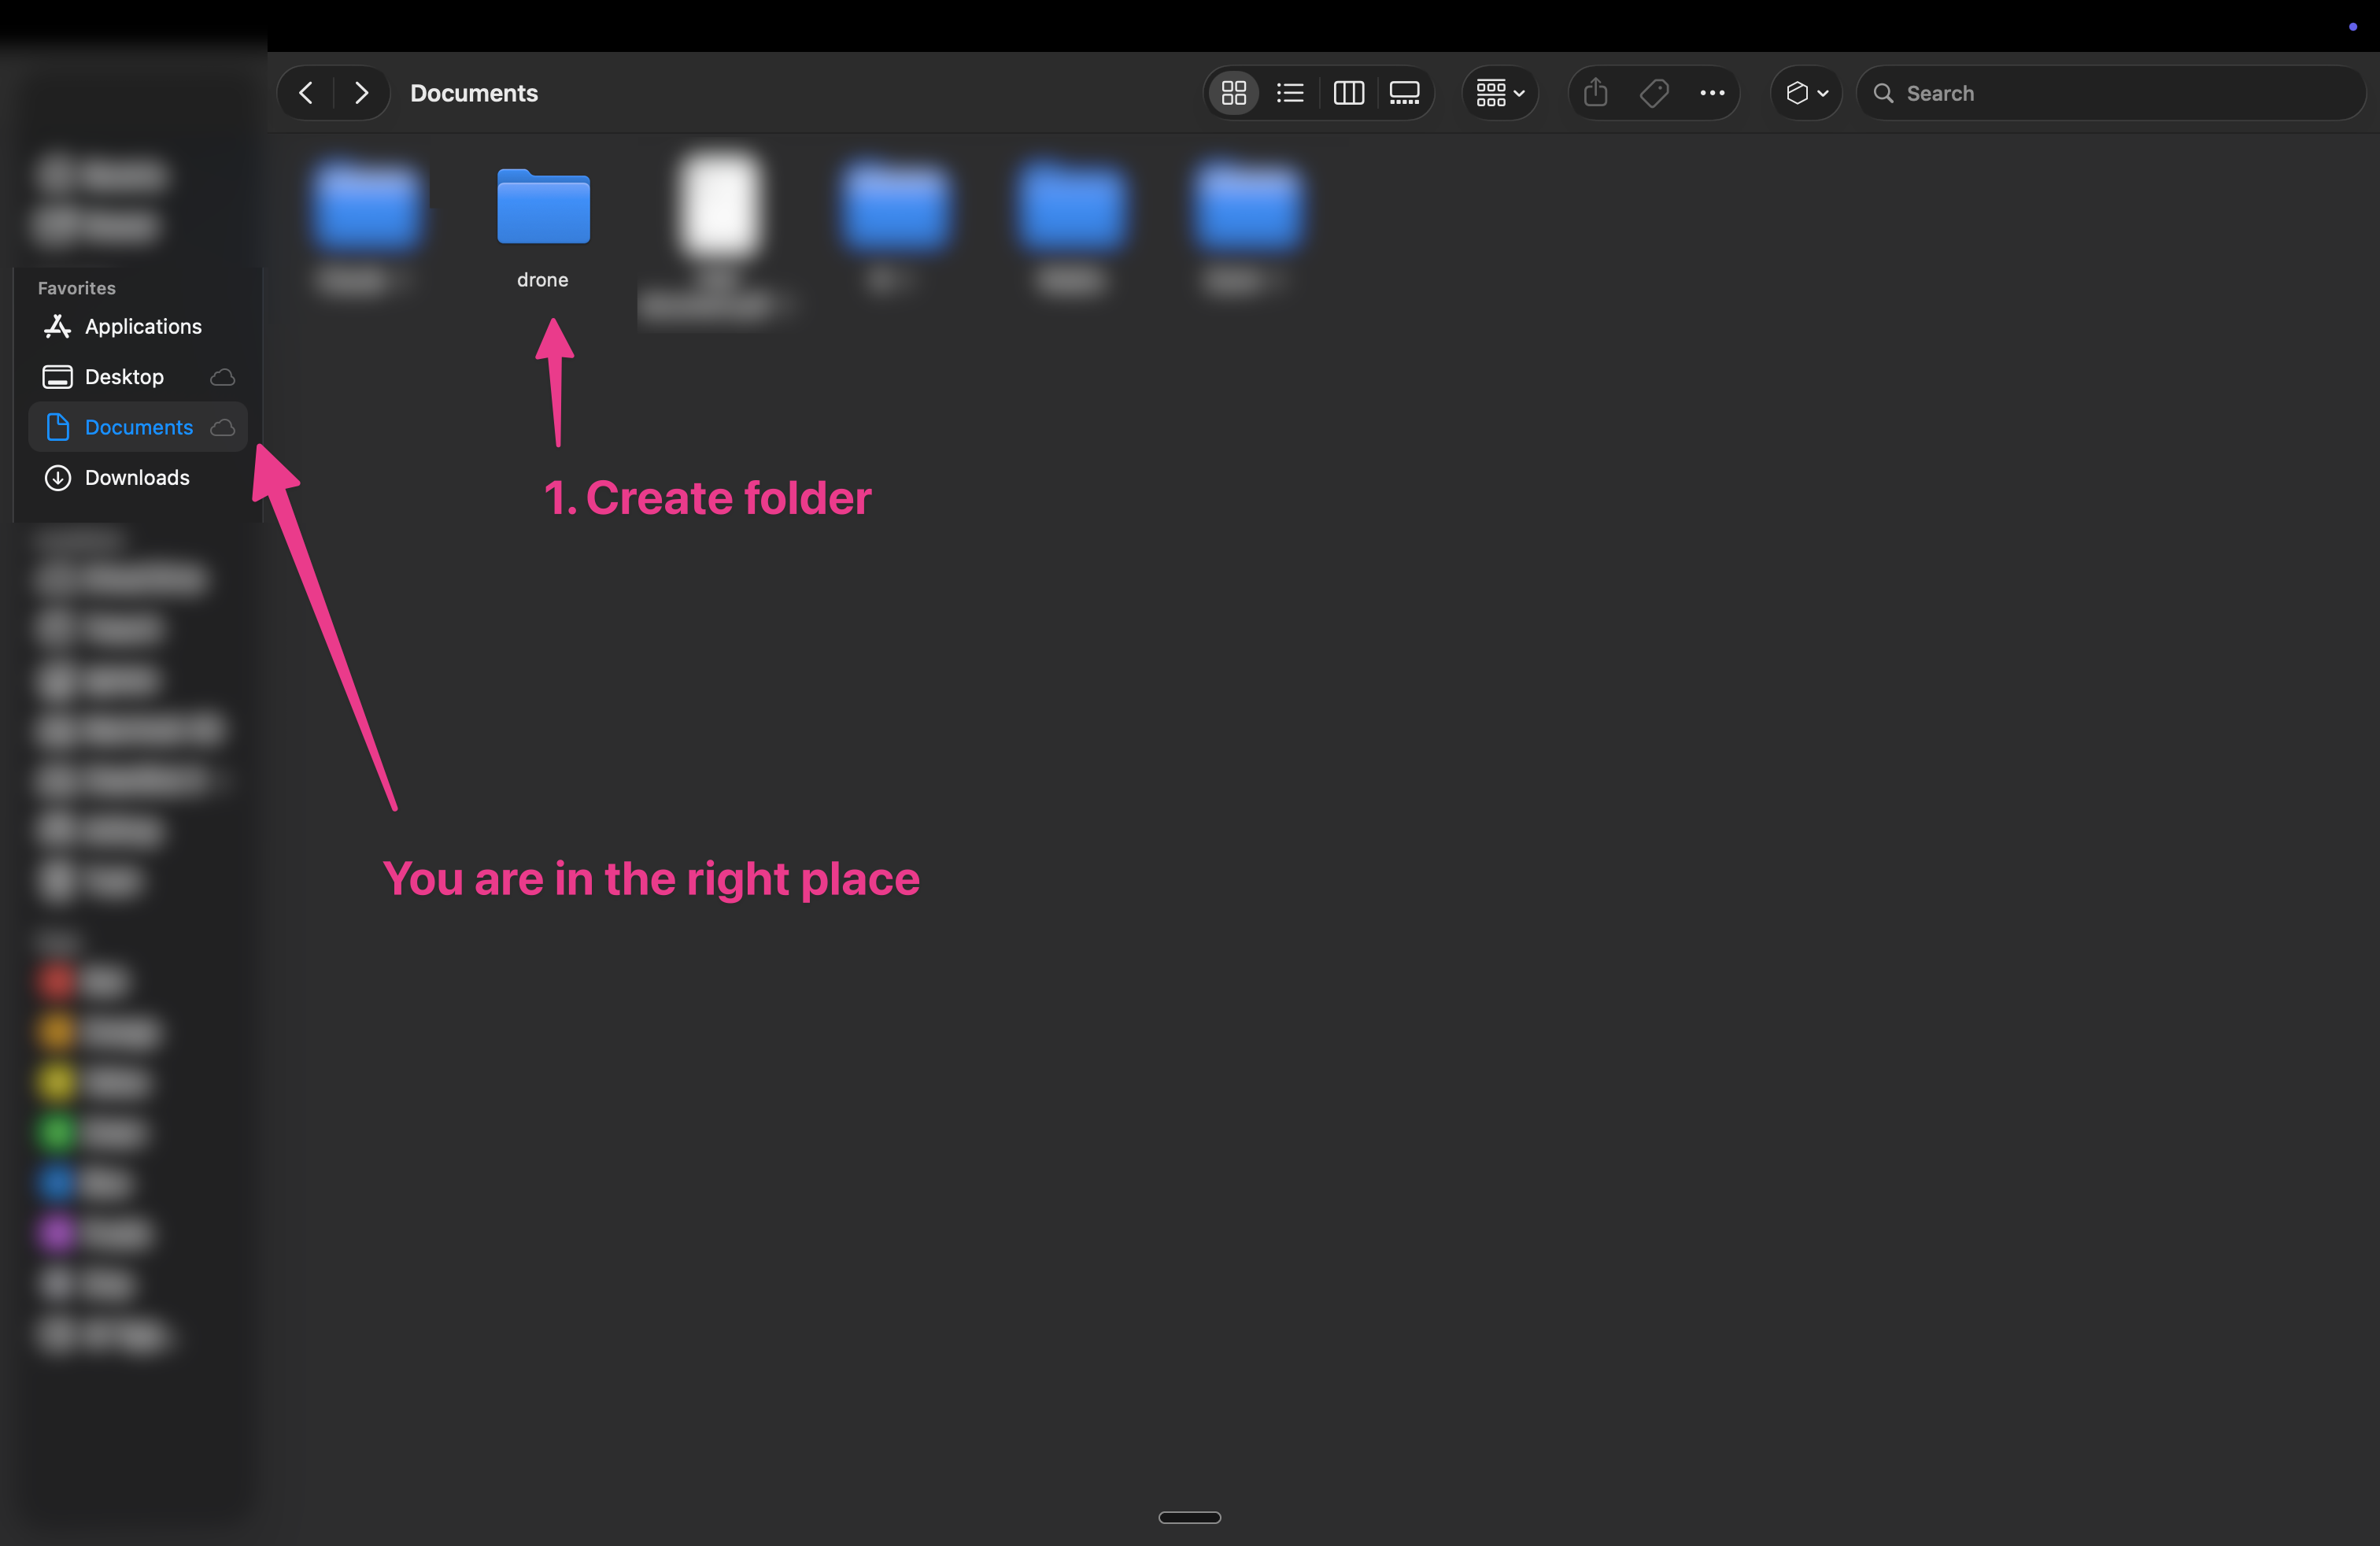
That's the base. Every screenshot you send from your phone will land here. Because your Documents folder is synced through iCloud, the drone folder shows up on your phone too. That's what makes the next step work.
Get the drone shortcut on your iPhone
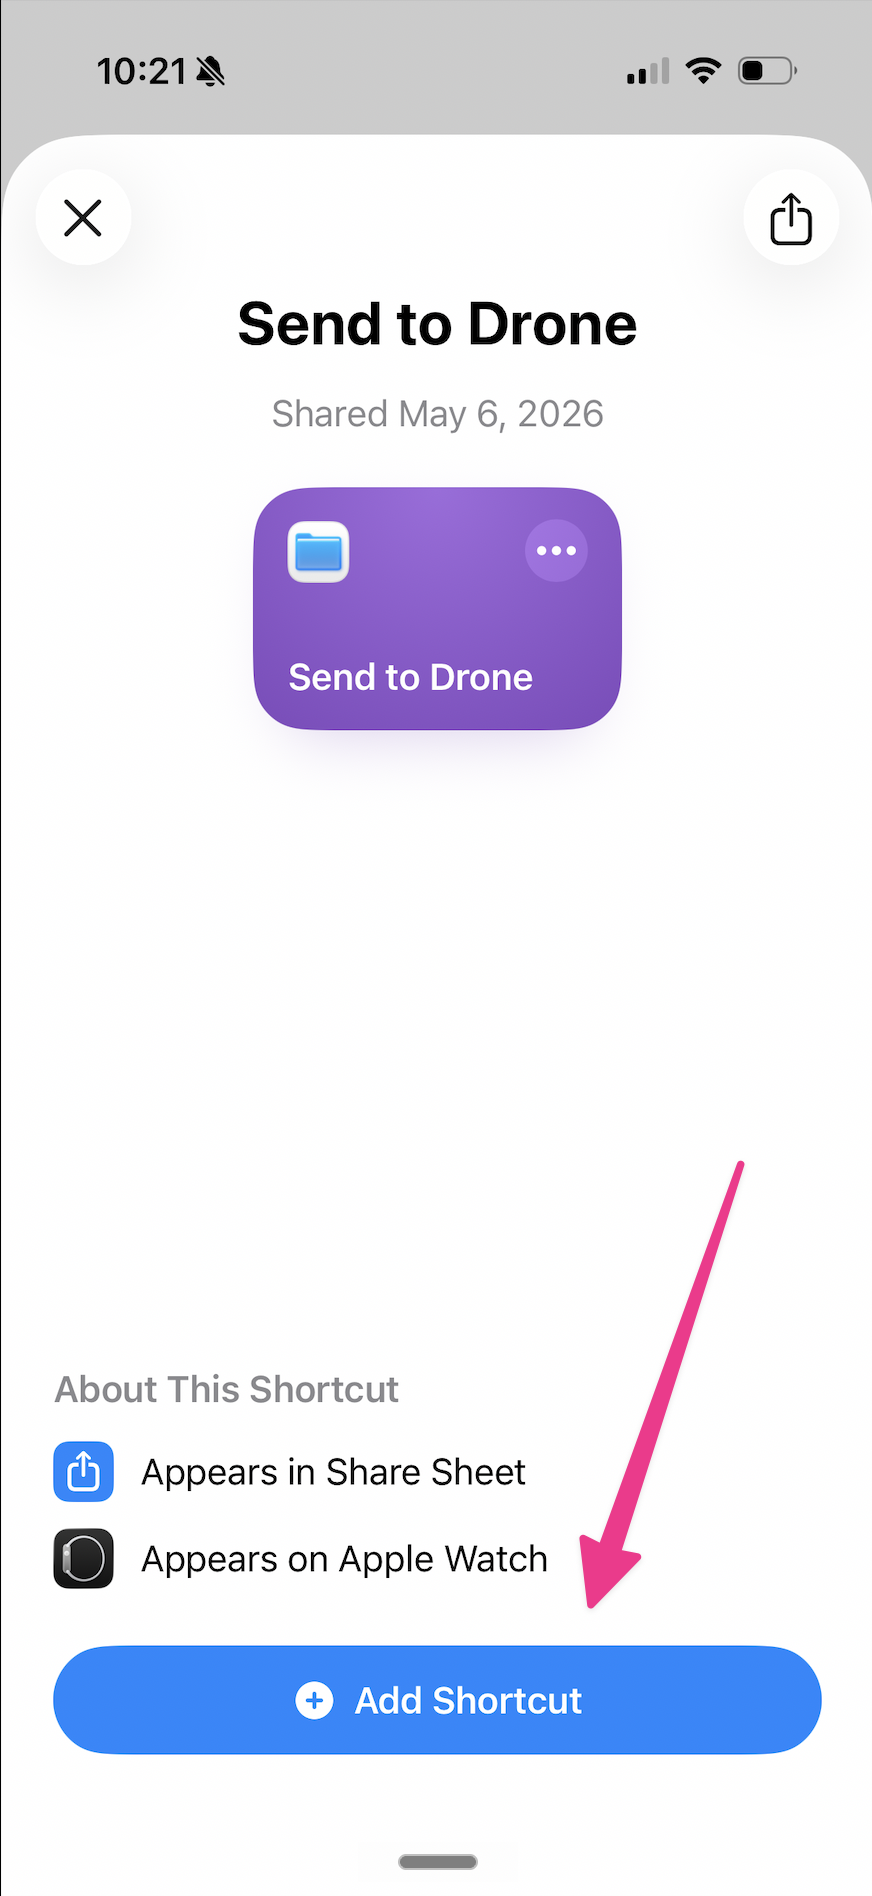
The fastest way is one tap. Open this link on your iPhone (not your Mac) and tap Add Shortcut when iOS asks:
Get the Send to Drone shortcut ↗
iOS will open this preview screen. Tap Add Shortcut at the bottom:
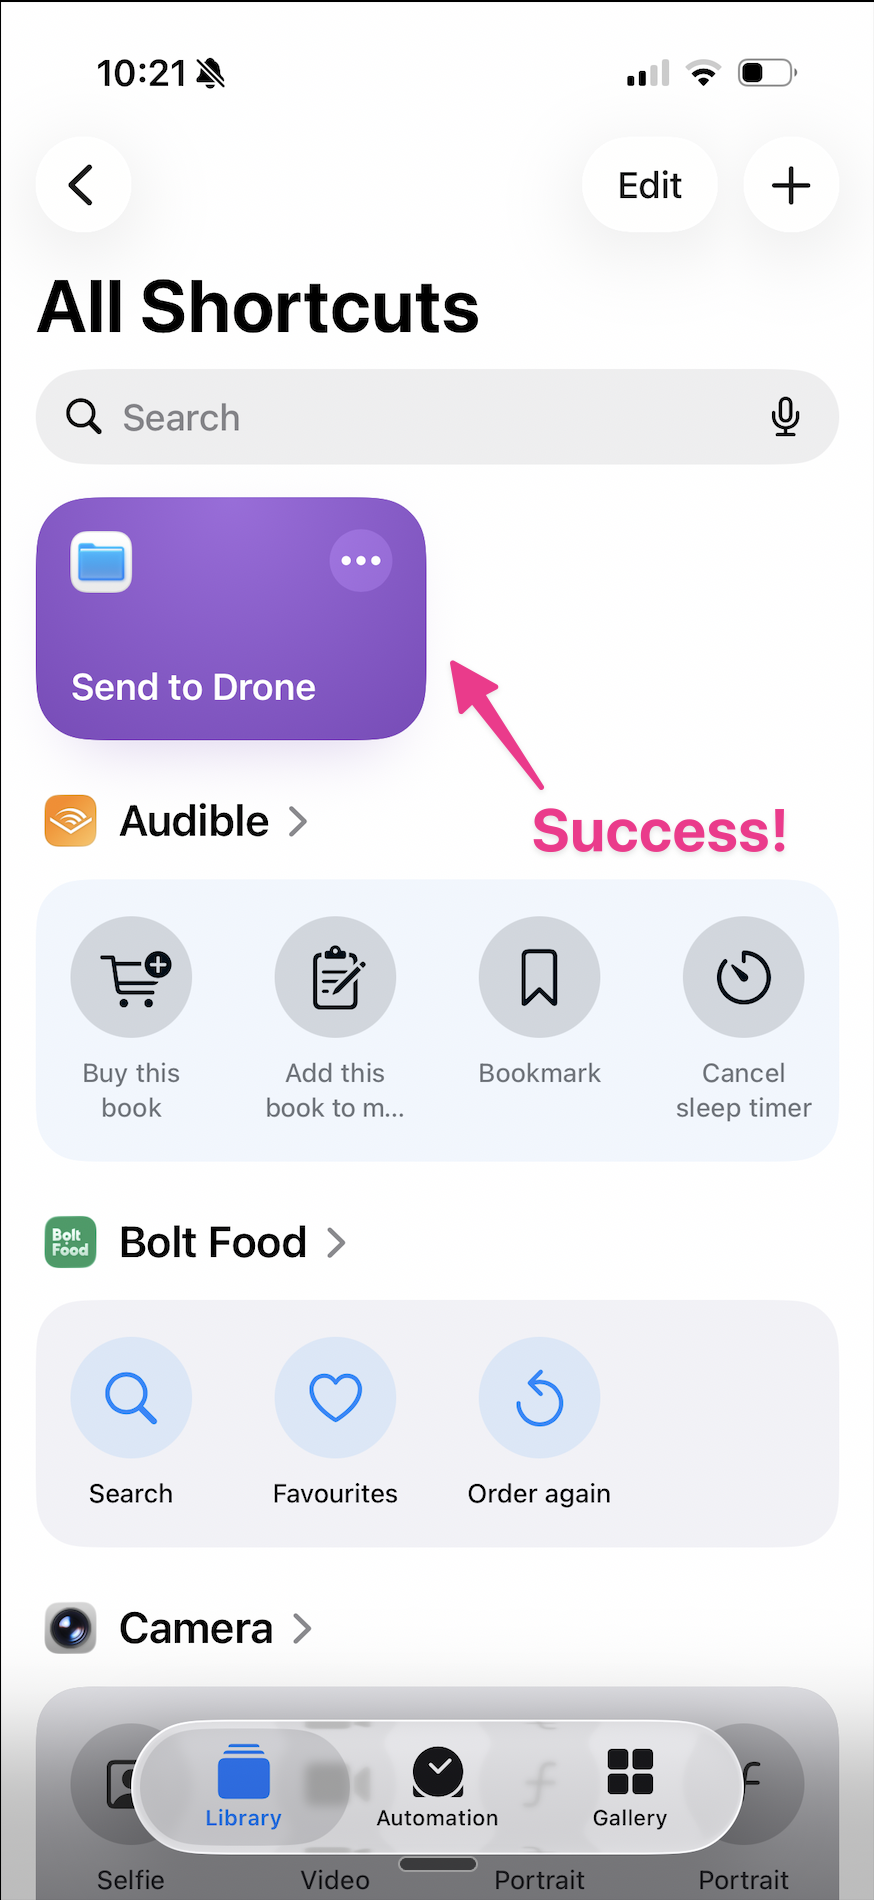
The shortcut lands in your Shortcuts library, ready to use:
One thing to check after you add it. The destination should be iCloud Drive → Documents → drone. To verify on iPhone: in the Shortcuts app, tap the three dots on the Send to Drone card. On the action labeled Save Images to drone, tap drone. The Files app opens at that folder. Tap the small triangle next to drone at the top of the screen (it opens a menu), pick Get Info, and look at the Where line near the bottom. It should read iCloud Drive → Documents. If it shows anything else, go back into the shortcut, tap the destination on the Save File action, and re-pick iCloud Drive → Documents → drone.
Want to build it yourself instead? (5 min, helps you understand each piece)
These steps are for iOS 26.
Step 1. Add Get Images from Input. Open Shortcuts, tap +. In the search bar at the bottom (it says "Search Actions"), search Input and pick Get Images from Input. Tap the Input field on the action, pick Shortcut Input. iOS auto-adds a "Receive Apps and 18 more from Nowhere" action above. Keep both. Tapping × on Get Images deletes the Receive action too, so leave it alone.
Step 2. Configure the Receive action. Tap "Apps and 18 more" (the input types tag), turn off everything except Images. Tap Nowhere, toggle Show in Share Sheet ON. Tap "Continue" (next to "If there's no input:"), pick Stop and Respond → No input. The action now reads "Receive Images from Share Sheet".
Step 3. Save File. In the search bar, search Save File and pick Save File. Tap "File", set source to Images (the output of Get Images above, not Shortcut Input). Tap Show More. Turn Ask Where to Save off. Tap Destination Folder → iCloud Drive → Documents → drone. Turn Overwrite If File Exists off. The action now reads "Save Images to drone".
Step 4. Show Notification. In the search bar, search Notification and pick Show Notification. Type Saved File in the message field.
Step 5. Name and verify. Tap the shortcut name at the top, pick Rename, enter "Send to Drone". Tap the info icon (i) at the bottom middle of the screen, confirm Show in Share Sheet is ON.
Final state, four actions stacked: Receive Images from Share Sheet → Get images from Shortcut Input → Save Images to drone → Show notification Saved File.
Add the ideas skill
This step teaches Claude what to do when you say /ideas. You'll ask Claude to create the file for you. One paste in the chat, done.
Make sure your claude-code-starter folder (the one from the main onboarding) is open in Claude Code. In the chat, paste this whole prompt and hit enter:
Create a new skill at .claude/skills/ideas/SKILL.md with this content:

---
name: ideas
description: Review the screenshots and notes the user sent themselves into their Documents/drone folder. Walk through each one, describe what it shows in plain English, and pull out any text. The user is reviewing their own ideas bin, don't push them to act.
---

# Ideas

When the user runs /ideas, do this:

1. List every file in `~/Documents/drone/`.
   If the folder is empty, say "Nothing in your drone folder" and stop.

2. For each file, in order:
   - If it's an image: describe what's in the screenshot in one or two
     sentences, then extract any visible text verbatim.

3. After you've walked through everything, ask once if the user wants
   to delete any of them now that they've been reviewed. Don't push.
   Most of the time the answer is "no, just wanted to see them." That's fine.

Tone: conversational, terse, one item at a time. Don't dump everything at once.
Claude will create the .claude/skills/ideas/ folder structure (the leading dot makes it hidden in Finder, but Claude handles that for you) and write the file. You'll see something like "Created .claude/skills/ideas/SKILL.md" in the chat.
That's it. The skill is now part of your project. Next time you type /ideas in this folder, Claude will follow these instructions.
Send your first screenshot
On your phone, open Instagram, Twitter, or Photos. Take a screenshot of anything (side button + volume up).
Tap the share button on that screenshot. Scroll down through the share sheet until you see Send to Drone:
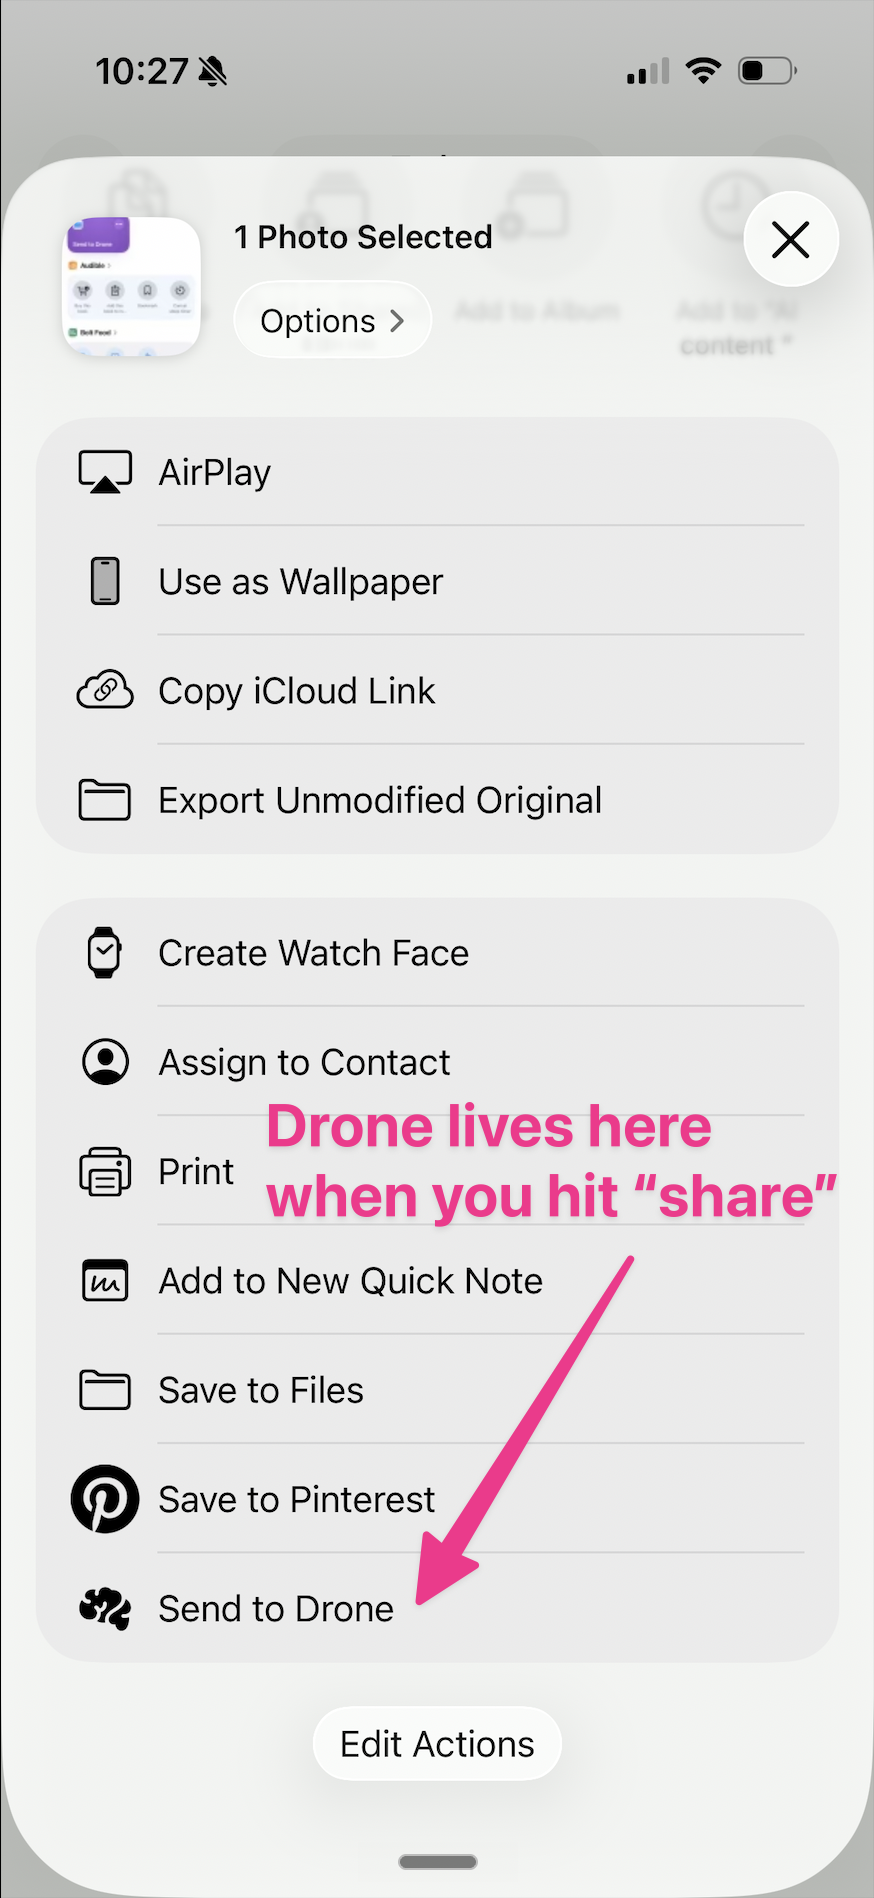
Tap it. You'll see your "Saved File" notification pop up.
On your Mac, open Finder → Documents → drone. Your screenshot is there. (If it isn't yet, give iCloud 30–60 seconds to sync.)
Read it back with /ideas
Open Claude Code. Open your claude-code-starter folder. In the chat, type:
/ideas
Claude reads the folder, describes what's in your screenshot, and pulls out any text. You review. That's it.
Quickstart
1. Paste this prompt in any Claude Code session:
Create a folder at the absolute path ~/Documents/drone (the user's home Documents folder, NOT inside any project subfolder, even if you are currently in a project context). Then create a user-wide Claude skill at ~/.claude/skills/ideas/SKILL.md with the content below.

---
name: ideas
description: Review the screenshots and notes the user sent themselves into their Documents/drone folder. Walk through each one, describe what it shows in plain English, and pull out any text. The user is reviewing their own ideas bin, don't push them to act.
---

# Ideas

When the user runs /ideas, do this:

1. List every file in `~/Documents/drone/`.
   If the folder is empty, say "Nothing in your drone folder" and stop.

2. For each file, in order:
   - If it's an image: describe what's in the screenshot in one or two
     sentences, then extract any visible text verbatim.

3. After you've walked through everything, ask once if the user wants
   to delete any of them now that they've been reviewed. Don't push.
   Most of the time the answer is "no, just wanted to see them." That's fine.

Tone: conversational, terse, one item at a time. Don't dump everything at once.
2. Import the iOS Shortcut on your phone. Get the Send to Drone shortcut ↗. Tap Add Shortcut. Verify the destination is iCloud Drive → Documents → drone: in Shortcuts, tap the three dots on Send to Drone, tap drone in the third action, then in Files tap the small triangle next to drone at the top → Get Info. The Where line should read iCloud Drive → Documents.
3. Fly it. Take a screenshot on your phone, share to Send to Drone:
4. Run /ideas in Claude Code when you want to review.
Capture without thinking. See a tool you want to remember? Screenshot it. Send to Drone. A workflow you want to copy? Screenshot. Send to Drone. Don't sort. Don't decide yet. Just gather.
Review when you sit down. Once a day, or once a week, run /ideas. Claude walks you through every screenshot you sent yourself. You remember why you saved them. Most of the time, that's the whole win.
Grow it later. When you've used Claude for a while, your folder starts to know what you're building. You can extend the skill yourself: "compare each item against my existing plans and flag what's worth integrating," or "save anything tool-related into tools.md." Just ask Claude to update the skill for you. Start with the simple bin. The smarts come later.
The shortcut isn't the point. The habit is. The shortcut just removes the friction.
"I don't see Send to Drone in the share sheet."
Scroll all the way down in the share sheet, past the messaging apps. If it's still missing, open Shortcuts on iPhone, open Send to Drone, tap the info icon (i) at the bottom middle of the screen, and confirm Show in Share Sheet is ON.
"The shortcut errors out when I share, with a path-not-found or destination error."
The Save File action in the imported shortcut is pointing at a folder that doesn't exist on your Mac. The most common case: the imported shortcut defaults to a nested path (e.g. Documents/Overmind/drone) but you only have Documents/drone.
Open Send to Drone on iPhone, tap the Save File action, look at Destination Folder, and compare it to where your drone folder actually lives. If they don't match, tap Destination Folder and re-pick your real drone folder (iCloud Drive → Documents → drone). Save and exit.
"I can't find 'Receive Input from Share Sheet' when I search in Shortcuts."
On iOS 26 the Receive action is no longer searchable as a standalone action. To get it, search Input, pick Get Images from Input, and set its Input source to Shortcut Input. iOS will automatically add a Receive action above. Keep both: tapping × on Get Images deletes the Receive action with it. Then configure Receive's input types (Images only), tap "Nowhere" to toggle Show in Share Sheet ON, and set "If there's no input" to Stop and Respond → No input. The action then displays as "Receive Images from Share Sheet". Full walkthrough is in the "build it yourself" expandable in Step 2.
If this feels like a lot, the iCloud import link in Step 2 gives you the same shortcut in one tap.
"The screenshot isn't showing up on my Mac."
iCloud Drive can take 30–60 seconds to sync. Check your iPhone is on Wi-Fi and that Desktop & Documents sync is on (System Settings → Apple ID → iCloud → iCloud Drive). If you see a tiny cloud icon next to the file in Finder, click it once to download.
"My iPhone Files app doesn't show a Documents folder under iCloud Drive."
That means your Mac's Documents folder isn't being synced to iCloud yet. On your Mac, go to System Settings → Apple ID → iCloud → iCloud Drive, and turn on Desktop & Documents Folders. Wait a minute or two. The Documents folder will appear under iCloud Drive on your phone.
"I can't find the .claude folder in my starter folder."
It's hidden by default on Mac. In Finder, while you're inside the claude-code-starter folder, press Cmd + Shift + . (period). Hidden files appear, including .claude.
"Claude says it doesn't know about /ideas."
Make sure the skill file is at claude-code-starter/.claude/skills/ideas/SKILL.md exactly. The folder name and the filename matter. Then close and reopen the folder in Claude Code. Skills load when the folder opens.
"Two screenshots saved with the same name overwrote each other."
iOS sometimes assigns identical filenames to consecutive screenshots. In Shortcuts, open Send to Drone, tap the Save File action, and turn Overwrite If File Exists off.
"Can I do this with voice notes or links too?"
Yes. In Step 2, leave more share sheet types checked (Media, URLs, Text). The shortcut will accept them too. Then ask Claude to update the skill for you: "Extend my ideas skill to also handle .m4a voice notes (transcribe them) and .txt files containing URLs (fetch and summarise)." Claude will edit SKILL.md on the spot.
"Do I need an Anthropic API key?"
No. Claude Code uses your Claude Pro subscription. The processing happens inside Claude Code on your Mac, not via the separate API. You're not paying twice.
Stuck? Email me at emil@ultrawinning.com.
Back to the main onboarding guide ↗